Creating a virtual Windows instance for testing and development
Prerequisites
- You need elevated access to install software development tools. Go to My Access and add the privilege app_PMW_PROD-RunElevated-Elevate. When prompted for Business justification, put: Required to install software development tools.
Your manager will have to approve this request
Launch Your Windows Instance
- Go to the Temporary OnPrem VDI page. Scroll down a bit and click on the Loaner Request button.
The Windows instance (and all of the data) will be deleted after 30 days. You can request an extension, however.
- On the Loaner MyOneDesktop VDI Request page, click on the Submit Request button.
Requests are typically filled in an hour or two.
You can not have more than one Windows VDI instance. If you want a second instance, you must first delete the one you have.
😀 There is no way for you to delete your instance once it is created. You will have to wait 30 days for the instance to be automatically deleted or request that it be deleted sooner (the contact person should be listed in the auto-generated Jira ticket)
You should see a Request Success window:
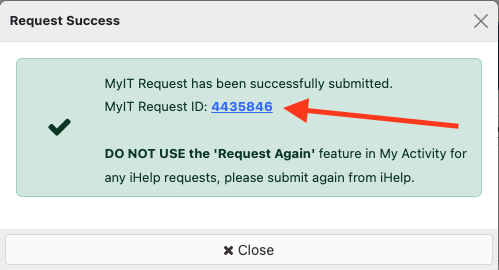
You can click on the MyIT Request ID link to check the status of your request
When your request is filled, You should receive an email with a login link. Login using Chrome or Edge here: https://MyOneDesktop.schwab.com Ignore the Citrix Workspace application that may automatically download. Instead, stay in your web browser:
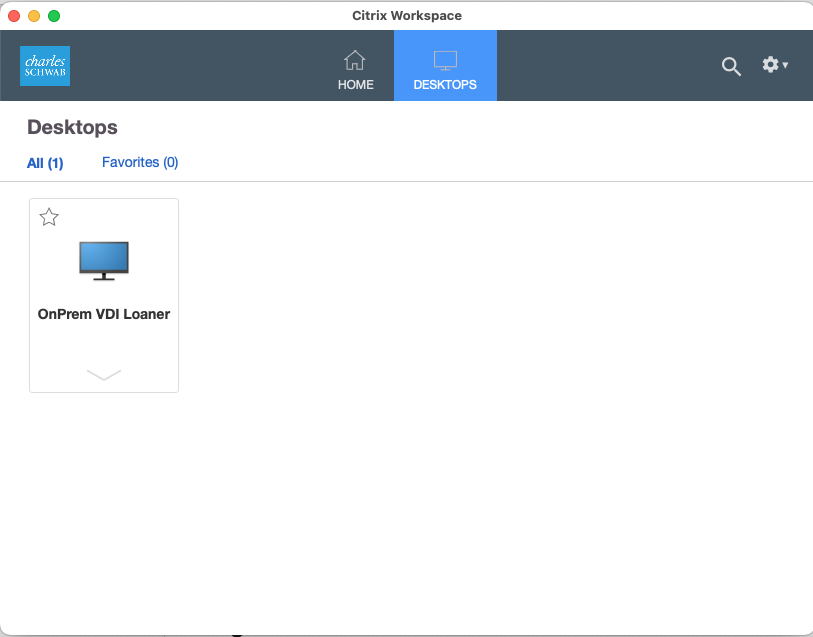
you should see an OnPrem VDI Loaner in your Citrix Workspace in the web browser:
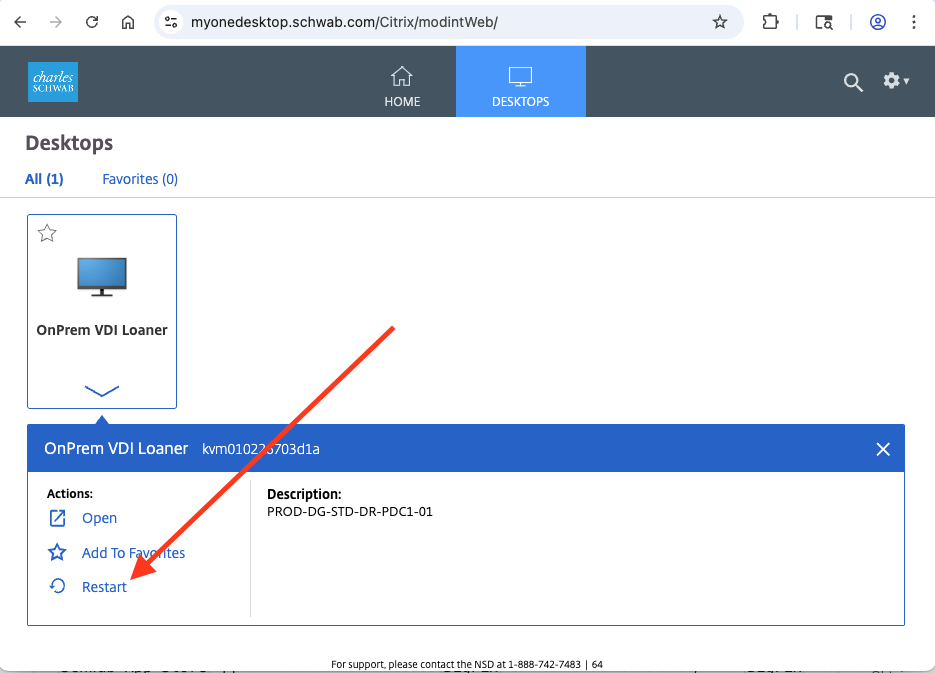
- Launch your instance by clicking on Open:

Obtain Necessary Software
The basic necessary software needed to create and develop with the Next.js docker container is:
- Docker desktop
- Visual Studio Code
- Nextjs-Docker.sh installer
- Git for windows
Installing Docker Desktop, VS Code And Nextjs-docker.sh
You should be able to install Docker Desktop, VS Code, and the Nextjs-docker.sh script through the Schwab App Store application which is also called BigFix. On the Windows instance, enter BigFix into the search bar and install them:
- Search for
dockerand installDocker Desktop - Search for
visualand installVisual Studio Code - Search for
nextjsand install theNextJS-Docker.sh - Docker Container Spin Up Utilityscript
If the nextjs-docker installer does not show up, restart your instance and open BigFix to try again.
 Restart your Windows instance
If you are unable to find the nextjs-docker.sh script, you can download it directly from our Github repo here. The same script is used for both Windows and MacOS.
Installing Git For Windows
Git for Windows requires a special request in order to deploy it on your Windows instance.
- On your Mac, go here: https://schwab-dwp.onbmc.com/dwp/app/#/itemprofile/4206
- Click on the
Request nowbutton - Click on the
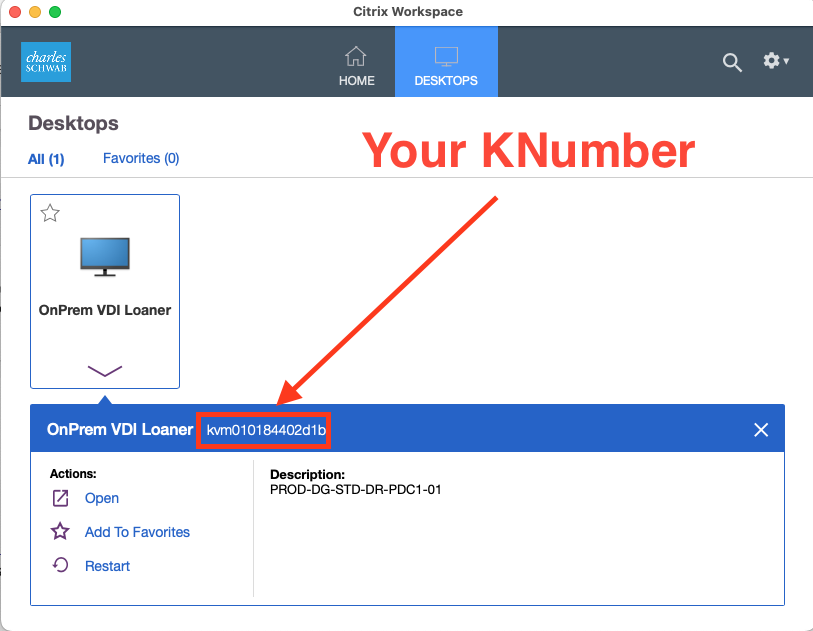
Choose from Allradio button - Find your KNumber (The KNumber shows up in your Citrix Workspace in the
OnPrem VDI Loanerdetails):
- Enter your KNumber. The entry box should search for the domain associated with your KNumber and show a domain name with it.
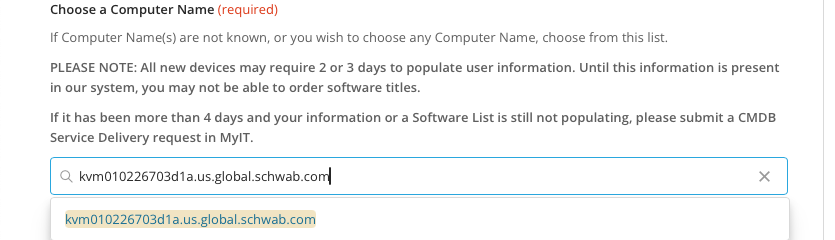
- Click on
Full Software List - Click on
Select. - You can enter any search term. Enter
gitand selectGit for WindowsClick on theSubmit requestbutton
On your Windows instance, go to BigFix and search for git. If you do not see Git for Windows, restart your Windows instance and search again.
Patching Curl On Your Windows Instance
The script that creates the Next.js Docker container requires repeated use of the curl command. The curl command on your Windows instance needs to be patched so that it can access the proper locations. You'll need the Zscaler root certificate from your Mac to configure curl on the Windows instance.
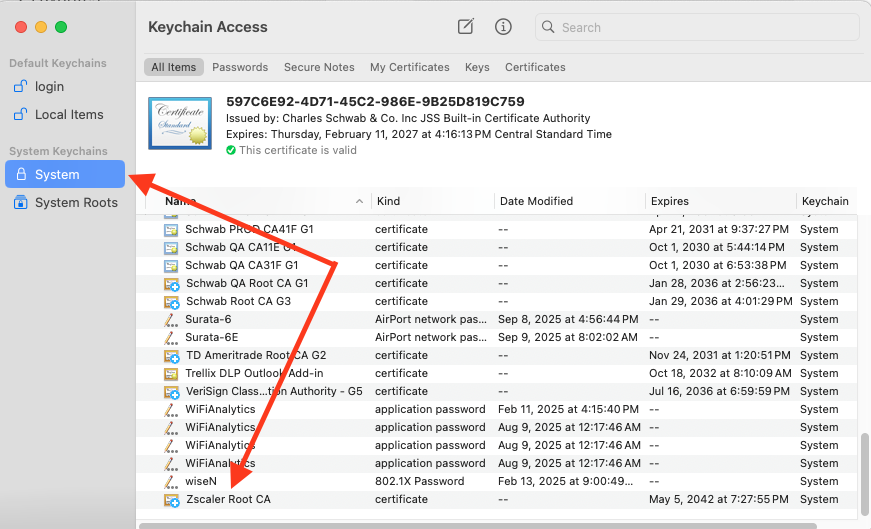
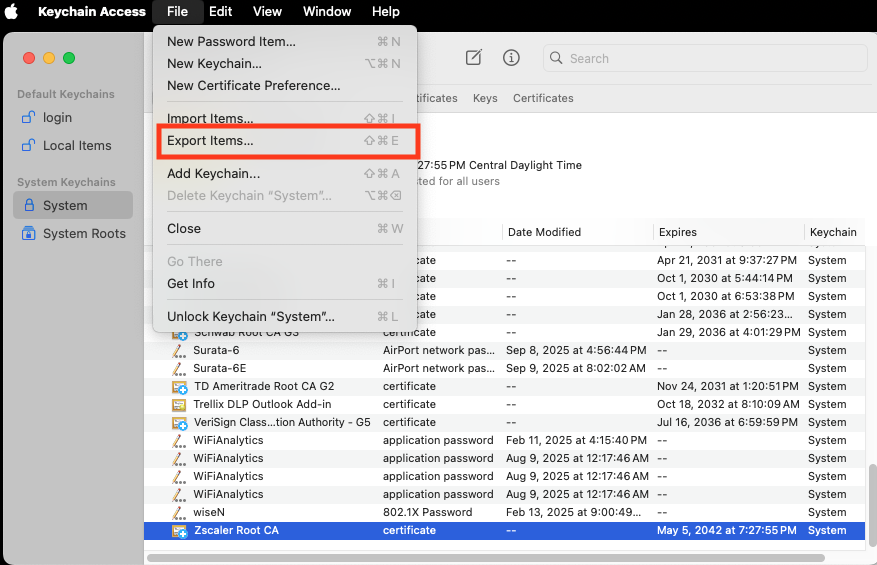
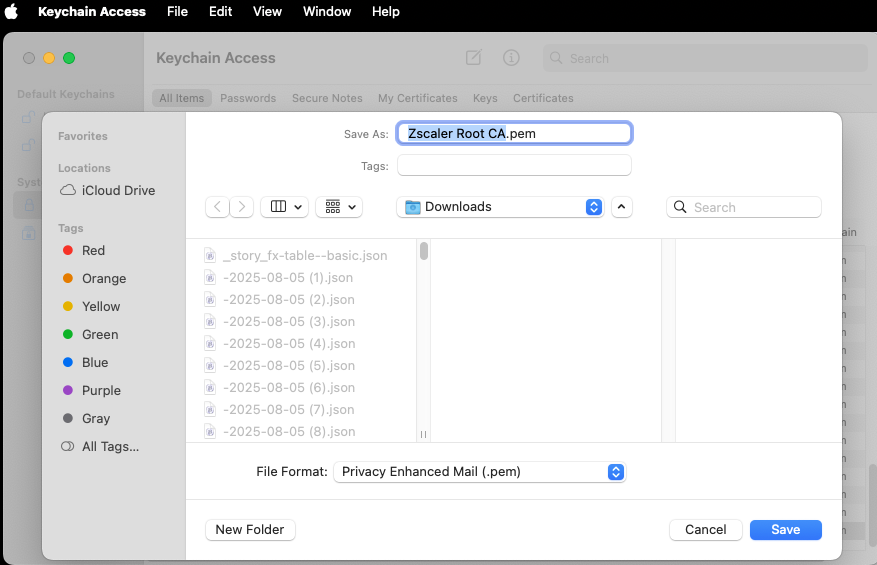
Obtain a copy of the ZScaler root certificate from your Mac:
- On your Mac, open the application
Keychain Access(you'll need to search for it on your Mac). - The cert is named
ZscalerRootCA.pem. - Export the cert to your Mac
| Step 1: | Step 2: | Step 3: |
|---|---|---|
 |  |  |
Locate, export, and save, your Zscaler Pem Key
Moving The ZscalerRootCA.pem File To Your Windows VDI Instance
You'll need to move the ZscalerRootCA.pem file to your Windows instance.
Unfortunately, the Windows VDI instances do not share the copy/paste clipboard or allow direct file transfer between your Mac and the instance.
However, Microsoft Teams and OneDrive are on both your Mac and on the Windows VDI instance with your identity. That gives you two ways to send data:
- Use
Microsoft Teamsand send yourself a message with any text or files that you need. - Place files in
OneDrive.
Curl Fix For Docker Desktop
Once you have the ZscalerRootCA.pem file on your Windows instance, and Git For Windows is installed, you need to create a special file on your Windows instance to fix the networking for Docker Desktop.
- Open a
bashterminal window (enterbashin the search bar and selectGit bash) - Create this file:
~/.curlrc - Edit the
.curlrcfile and add the two lines below (you can usenanoAKAvito edit it, or open it inNotepad). Make sure that the fileZscalerRootCA.pemis in the location shown below and replaceYOUR.NAMEwith your Schwab user name:
cacert="c:/users/YOUR.NAME/OneDrive - Charles Schwab & Co, Inc/ZscalerRootCA.pem"
proxy=http://127.0.0.1:9000
Creating Your Next.js Docker Container
Launch Docker Desktop. With a Git bash terminal window open, locate the file nextjs-docker-install-latest.sh.
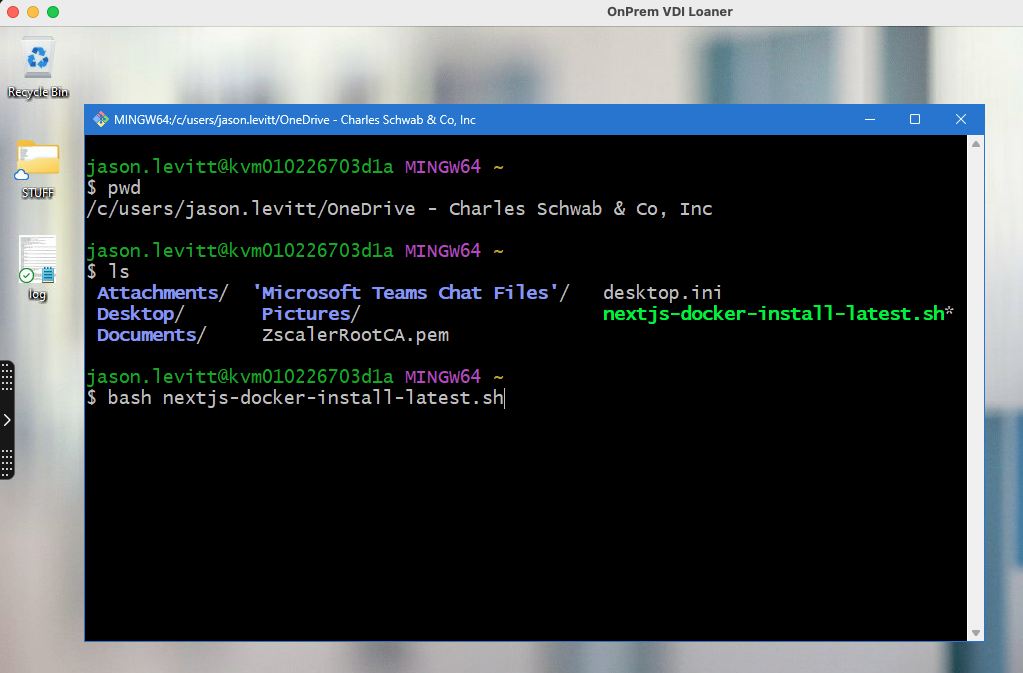
Running the script will take you through the expected flow. You'll need your GitHub and Jira tokens which you'll probably want to copy over from your Mac.
If the script exits prematurely (probably where the first curl command occurs), you probably need to check the curl patch you made earlier
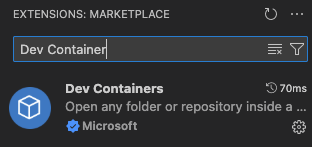
Configure Visual Studio Code And Connect To The Container
Make sure that your container is running in Docker Desktop. Launch VS Code and install the two necessary VS Code extensions:
- Install
Dev Containers
- Install
Docker DX

After attaching to the container, wait a few minutes. If the container appears hung, go to VS Code's File menu, select Open Folder and open /home/nextjs-web. The usual scripts should execute. There might be an extra Vercel authentication step.